April 9, 2015

DIY Bunny Wreath on a Budget

My daughter turned 2 over the Easter weekend and we celebrated with a bunny themed birthday party. We had food, games and an Egg hunt. She had a blast. 

In preparation for the party I made a bunny wreath.

It was sunny and really when are all the 
kids ever looking at the camera

I didn't have the budget to make or buy a grapevine bunny wreath. Although I think they are adorable and hope to make one for next year. I went to Pinterest and found this tissue paper wreath tutorial. And the wheels started turning and thus the idea was born for this Tissue Paper Bunny Wreath. 


I found this great Grapevine Bunny Wreath Tutorial Here, which I will use someday. 

Then found the Flower Wreath Tutorial Here

I used followed her tutorial only I added cardboard ears to mine. It was easy and very inexpensive. I had everything on hand but you can find white tissue paper and most dollar stores. It fit my budget very well. I added a bow with hot glue and it was done. I finished in an evening while watching House with my husband. 


Thanks for stopping by! Hope you enjoyed!

~Rachel~

February 11, 2013

Baptism Towel & Poem

We have a family friend who is getting baptized this week. I made her this towel. I bought the towel at Ross and the trim and Joann's. I simply sewed the trim to the bottom of the towel. If you get one yard of your trim will should have some to spare with most standard towels. 


I also made this tag to attach to the towel. Feel free to download and use it as well. 


We are excited for her to make this step in her life. Thanks for visiting!

~Rachel~


October 24, 2012

Days Until Chalkboard

These have been very popular with my friends and family and I wanted to share them. 


These Days Until Chalkboard count down signs are great for any occasion. You can count down the "days until" a new baby, a birthday, a Disney vacation, a special holiday like Christmas, the last day of school, a wedding, and all the great day your family looks forward to. 

You can purchase the kit to make it yourself here at Vinyl Lettering Co's etsy shop. They make great gifts and you can even say "I made it myself". 


~Rachel~

April 9, 2011

Waiting for Baby Crafts

Hello fellow crafters. It has been a long time. Around the time of my post on Mary Endelbreit Shadow Box I got a new full time job and found out I was pregnant. This might give you an idea of why I have only had one post since then. Recently I stopped working to get ready for the baby. He is due April 20th. However I am going to be induced sometime next week. YAY! I have been on bed rest and not able to do a whole lot but have done a few crafts while waiting for our bundle of joy. I got this Fossil Key Per Messenger Tote for my birthday back in November, Thanks to my mother-in-law. Love it! Unfortunately this color is no longer available but there are many other patterns that are fun and retro. I am using it for a diaper bag and wanted some accessories to go with it.


I made just a few. I used this D.I.Y. boutique wipes case tutorial from According to Kelly and made a matching wipe case. It is hard to see but I quilted the top layers of fabric.


I like this tutorial because of the way the trim is done. There are so many tutorials out there that I am sure offer other great ideas.

The other accessory I made was a changing pad. I used Homemade by Jill's tutorial. Her changing pad turned out so fabulous. I really liked what she did with embellishments and detail. I followed it to a T.


My inside fabric was not laminated fabric. I already had some Heat n Bond Vinyl and used that to water-proof my changing pad. We will see how it holds up. If you have used it before leave a comment and let us know how it worked for you. The fabric on the inside is the same fabric I used for another project I did for the baby as well. I will post that later.

It's been great getting back to the blogging world. Hope you enjoy.

~Rachel~

November 22, 2010

Crafting Up Christmas with Shutterfly

I am really looking forward to the Holidays. For the last 2 years my hubby and I have sent out photo Christmas Cards (even though its been just the two of us). I really love them, both sending and receiving. All the products Shutterfly offers are really great. I have been using their products for a long time.


I made our honeymoon photo album with them, and just a few weeks ago I sent out our change of address cards that I ordered from them. I am really looking forward to choosing from their Christmas photo cards. There are so many to choose from here are a few of my favorites...


There are so many ways you can use Shutterfly this Holiday Season. Make gifts for your loved ones with their photo albums and calendars, or send holiday cheer with their holiday, Christmas, and Hanukkah cards. Get started now by uploading your photos. If you sign up for their emailing list they will send you all of their latest sales and deals.


~Rachel~

August 19, 2010

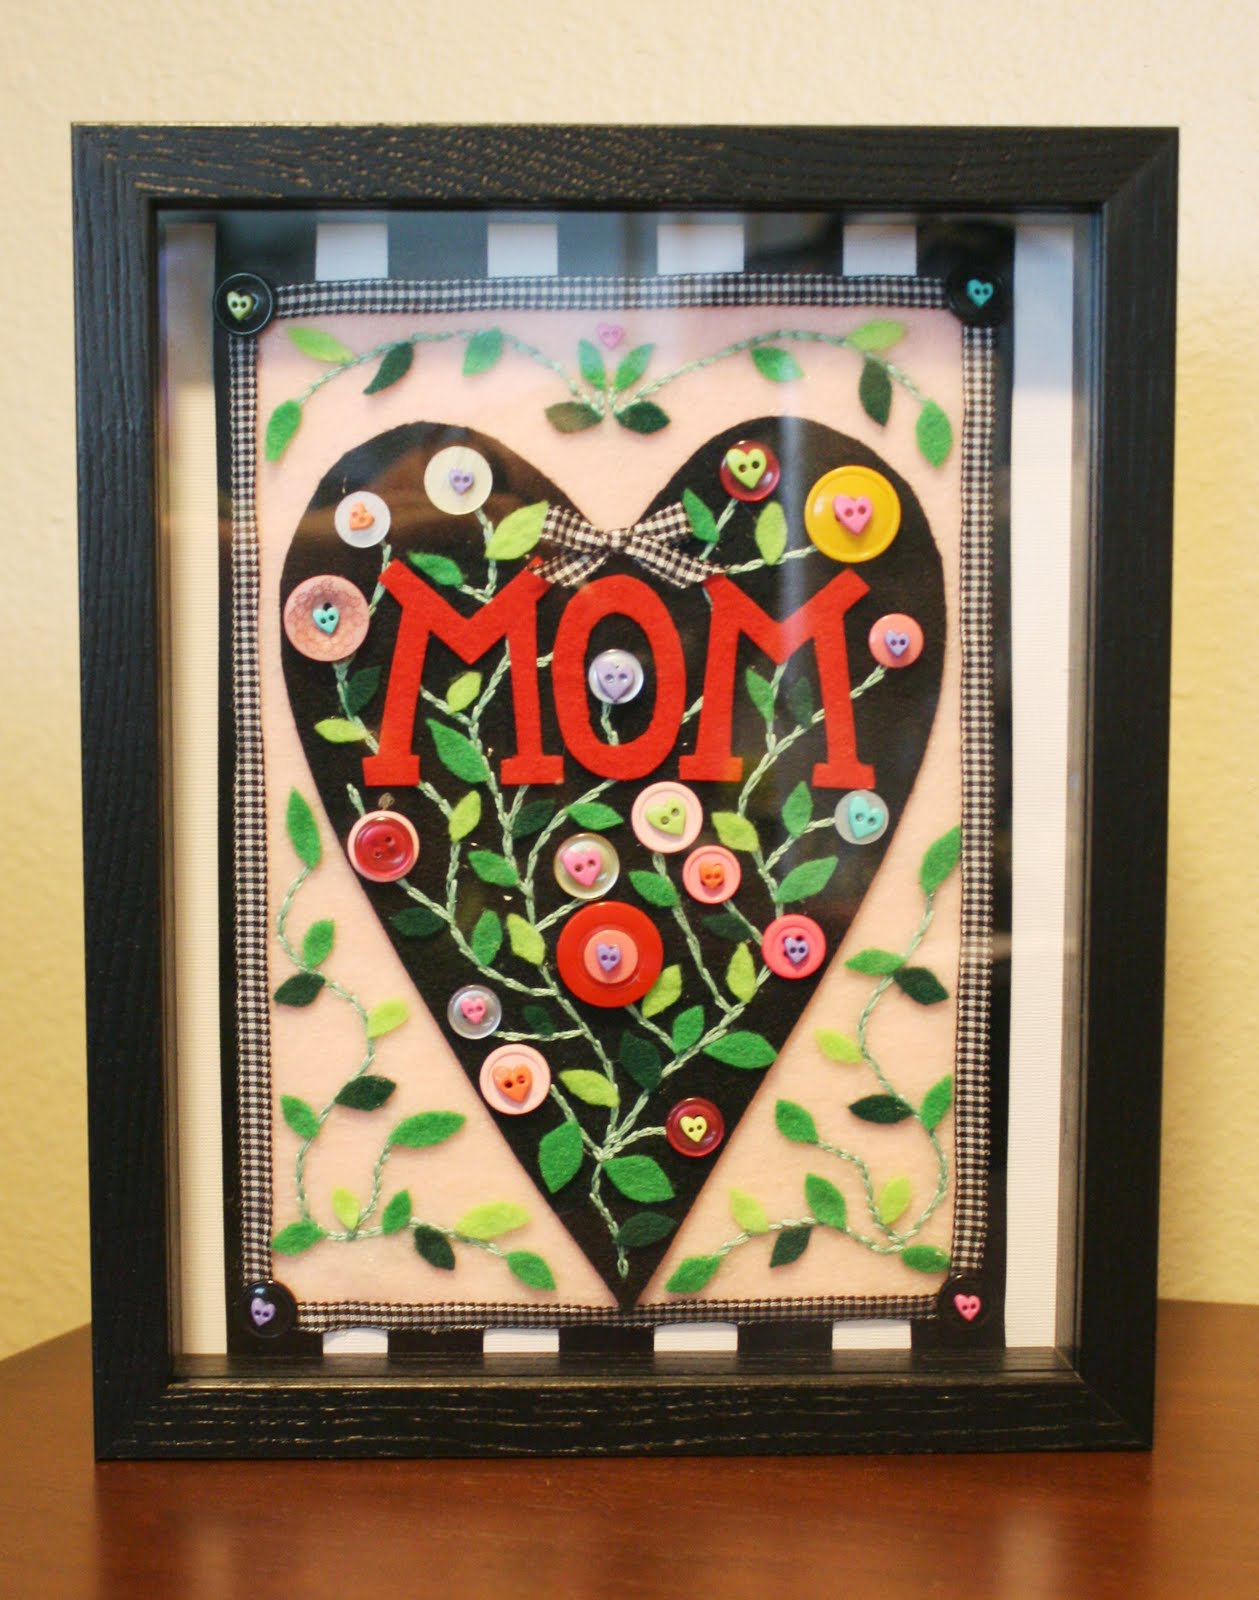
Mary Engelbreit Shadow Box for Mom


I think every crafter has a special place in their heart for Mary Engelbreit. My Mother-in-law and her mother have always loved anything and everything Mary Engelbreit. I used to visit teach a sister who's house was honestly ceiling to floor Mary Engelbreit. If you aren't a lover yourself I am sure you know a woman who is.


I came across this photo and I wish I could tell you where I found it. I believe it was on the Mary Engelbreit blog. I couldn't find it on there again though. I really liked it and at the time was trying to think of a gift to give to my Mother-in-law. Here is my version. You could make this for your mother or mother-in-law. You could even change it to say friend or sister to make it work for your Mary Engelbreit enthusiast.


Supplies:
White card stock
Black ribbon 7/8"
Pink felt
Green embroidery floss
3 different shades of green felt
Black felt
Adhesive red felt
Variety of buttons (red, pink, yellow, blue)
Heart buttons
Black bottons
Black and white ribbon
Shadow box
I bought all my supplies at Joann's for about $30 dollars


Start by cutting your white card stock to fit in the shadow box. This tutorial follows an 8.5 x 11 shadow box. Cut 5 pieces of black ribbon in 10 3/4" strips.


Glue or tape ribbon on paper a half inch apart starting from the middle and working your way out. You will want some of it to over lap.


Cut pink felt in a 6 1/4" by 8 1/2" rectangle. Also cut heart out of black felt. Drawn a line with a pencil of where you want to stitch, then stitch along the line.


You can use this as a template. It is also best to have your black felt heart to use as a template so you know where to draw your line for the stitching.


Cut leaves out of green felt. You will need:
20 of green
8 light green
10 dark green


Place the heart on the pink felt, but don't glue. This will allow you to use it as a guide to place the leaves. First place leaves where they will go, then glue one at a time.


This is what it will look like after you glue the leaves down. Isn't it starting to look more like something then just felt and thread?


Now you will trace your lines for stitching on the black heart. I placed my bigger buttons down give me a guide but these can be more random.


Everything is being glued over the top of the stitching.


You can use this template to cut MOM out of red felt.


DO NOT glue MOM on yet but place it on the black heart so you will know where to place the buttons and leaves. The leaves on the heart can be placed depending on how you did your stitching. I started from the bottom placing the leaves and buttons but not gluing them. After everything is placed then you can glue.


I waited to do MOM last. Remove paper to expose adhesive. I also added a little hot glue to make sure it stayed on well.


Now glue the decorated heart to pink felt. Then glue the pink felt to card stock with ribbon on it. Line the pink felt with the black and white ribbon. Also tie a bow with the black and white ribbon and add to top of heart. Glue black buttons and heart buttons to every corner.


There you have it. It's ready to go in the shadow box.


On a scale of 1 to 10 for love of doing a craft this one gets a 9. I really enjoyed it.


~Rachel~

August 17, 2010

Chocolate Bundt Cake Recipe

This a family favorite. My moms makes it quite often and my cousin in pretty much pro at it. It is great at satisfying a chocolate craving.


Here is a recipe card for your printing pleasure.


Here is the recipe if you just want to copy and paste.


Cake
1 box Devil’s food cake
1 cup or 8 oz. sour cream
5 oz. box instant chocolate pudding
1/2 cup of oil
1/2 cup warm water
4 eggs
6 oz. chocolate chips

Icing
1 stick of butter
4 T. cocoa
6 T. milk
1 pound powered sugar
1 t. vanilla

Cake: Mix all ingredients together in mixing bowl. Pour into greased (using cooking spray) Bundt pan. Bake at 350 degrees for 50 minutes. Allow cake to cool.

Icing: Bring butter, cocoa, and milk to boil. Add vanilla and powdered sugar 1/2 cup at a time while mixing. Mix well until all powdered sugar is dissolved. Pour over cooled cake immediately.


Tips
*Don't use flour when greasing bundt pan or the cake with
have a white coat on it when its done baking.

*Put cake in the freezer to cool faster. 25-35 minutes usuall does the trick.


Please enjoy and let me know how it turns out if you make one.

~Rachel~

August 14, 2010

Fabric Flower Tutorial

I found this fabulous fabric flower tutorial from Crochet & Sweet Simple Things by Dawn. I love it. I was able to do the machine sewing then take the rest and finish on a road trip.

I made this white one for my cousin. Her family was going through the temple and she was getting baptized shortly after.


These I made for my sister for her Birthday. The black and orange one is for Halloween.


What a great tutorial! It was really easy to follow. This is a good beginner sewing project because there is not a lot of fancy machine sewing involved.

I know there are a gazillion tutorials out there for fabric flower tutorials. I would love to know your favorite.

~Rachel~

Leave the link for a fabric flower tutorial you have written or one you have come accross here:

August 10, 2010

Etsy Shop Open for Business

Do Do Doooo (Trumpets Sounding)

Ladies. I present to you, with a high pitched excited voice
Bayberry Creek Crafter's Etsy page.


Some of you may have already noticed that I have changed my left side bar and added my Etsy mini shop. These are the current items I have listed in my shop.


There will be more variety of these bags to come soon.
As well as new products all together. So stay tunned!


~Rachel~

DIY Mouse Pad

My former mouse pad was a photo of the Eiffel tower that I bought at a Target. It had seen better days and I was in need of a new one. I was at Ikea (a store I frequent quit regularly), and same a across a pack of three trivets. You know the things you use to place hot pots and pans on. Well I decided I needed two, but not all three. As I finished my route through the store I brainstormed on what I could use the third for. As I was testing out office chairs I came up with this idea.

Trivet/Cork Mouse Pad


What you need:
-Trivet or Cork cut to 7" circle
-Fabric
-Heat and Bond
-Iron
-Pencil
-Scissors


Start by ironing your fabric so it is wrinkle free. Then cut out a 8x8 piece of heat and bond. Iron that to the wrong side of your fabric following product instructions. Let it cool.


Then using your trivet or round piece of cork trace on to the heat and bond. Trace it as tight, or as close to the cork as possible. Try to make your circle a little smaller than the cork. That way it will not hang over the sides.


Now using scissors cut out your circle. Again try make the fabric smaller than the cork so cut on the inside of the line you traced.


After you have cut out the circle, peel of the paper of the heat and bond. Place the circle on the cork and iron on using product instructions.


After it cools it is ready to use. Mine is on our desk in the office.


This is a quick and easy project. Take a shot at it and if you do I would love to see how it turns out.


~Rachel~

August 7, 2010

Jedi Robe

Pinterest Visitors & Everyone Else:
You can purchase a completed robe or the tutorial for this cute Jedi robe in my Etsy Shop.
They are listed on my side bar. Thanks for visiting! 

How cute is my nephew? He is a huge fan of Star Wars and I wanted to give him something he could use along with all his lightsabers.


It is made out of fleece. I used a t-shirt of his to start with to make sure it was the right size and measured him from shoulder to toe to make sure it was the right length. I also used a jacket of mine as a pattern (kind of) for the hood. I made it a little larger since they are over sized anyways.


I made this tag for gift giving purposes only.
Stars Wars Corp: I am not trying to steal any logos. I promise
:)


Take a go at it. If you would like one and don't feel you have the skills to make one on your own. Please contact me and I would be happy to help.


~Rachel~
Related Posts with Thumbnails